Last updated: August 10, 2026
You bought the ramp, set it against the tailgate, and your dog looked at it like modern art. This is the normal outcome: teaching your dog to use a ramp is a real training step, not because ramps are hard, but because a sloped, slightly springy surface is genuinely novel to an animal that has walked on flat, solid ground its whole life. Dogs do not generalize from stairs, and they do not trust footing they have never felt.
The good news is that ramp training is one of the most reliable pieces of dog training there is: a short, treat-heavy sequence that most dogs complete inside a week. This guide walks you through it step by step, covers the special cases (seniors, nervous dogs, the dog that slipped once), and lists the mistakes that create refusals in the first place.
Quick Answer
How do you teach a dog to use a ramp?
- Start flat: lay the ramp on the ground and reward your dog for walking across it until that is boring.
- Raise it gradually: add slope in small increments over several short sessions, rewarding calm walking in both directions.
- Never force, never rush: luring and patience build a ramp habit; pushing a dog up a slope builds a ramp phobia.
The Step-by-Step Training Plan
Keep sessions short, five minutes or less, one or two per day, and end each one on a success. Save this plan; the steps work for any ramp, indoor or vehicle.
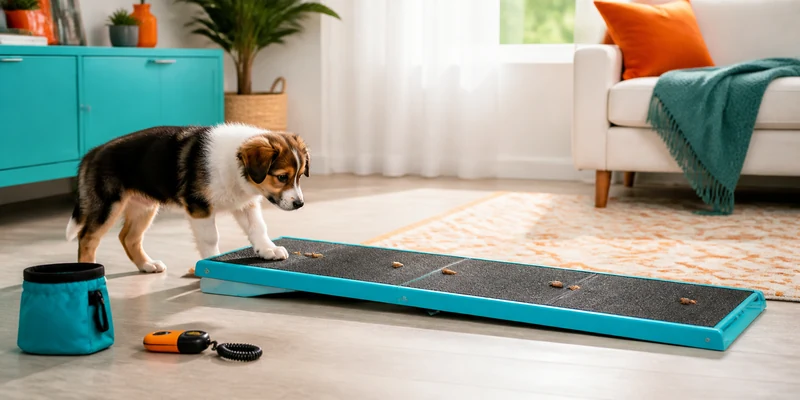
- Set the stage. Put the ramp flat on the floor in a familiar room, on carpet or a rug so it cannot shift. Let your dog sniff and investigate it without any agenda. If the ramp moves or rattles during this first meeting, fix that before going on; one wobble now costs you days later.
- Reward any contact. Toss a treat next to the ramp, then on its edge, then on its surface. Praise every paw that touches the deck. Do not lure your dog all the way across yet; you are buying the idea that the ramp is a treat dispenser, nothing more.
- Walk it flat. Lure your dog across the full length of the flat ramp with a treat trail or a hand target, in both directions. Repeat until your dog trots across without hesitation. A dog that hops off the side halfway is telling you to slow down, not to push harder.
- Add a low incline. Prop one end on a low, stable platform: a step, a low box, a stack of books that cannot shift. Repeat the treat-trail crossings both ways. The change in footing angle is the whole lesson here, so keep the height modest and the praise generous.
- Raise in increments. Over the next sessions, step the height up gradually toward the real target, the couch, the bed, or the tailgate. If your dog balks at a new height, drop back to the last comfortable one, bank a few easy wins, and try again next session.
- Practice the descent deliberately. Going down is the scary direction and the one that matters most for joints. Guide the first descents slowly with a treat held low and close so your dog walks rather than launches. Reward calm, full-length walks down every time.
- Move to the real location. Set the ramp up at its working spot, secured exactly as it will be used: lip seated on the tailgate, base planted, no gap at the bed. Re-run steps 3 to 6 quickly there; most dogs compress the whole ladder into a session or two at the new site.
- Make it the only path. For a couple of weeks, block the old jumping route where you can, guide every trip over the ramp, and reward at the far end. When your dog chooses the ramp with no cue and no treat in sight, the habit is installed.
How Long Should This Take?
Most dogs move through the whole sequence in three days to two weeks, and the spread is about temperament rather than intelligence. Food-driven, confident dogs sometimes finish the flat-ramp stages in one session; cautious dogs and dogs with a prior slip need the slow version. Puppies typically learn fastest of all, which is a real argument for introducing a ramp years before it is medically interesting, especially for long-backed and giant breeds.
The timeline stretches when the ramp itself argues back. A slope that is too steep, a surface that slips underfoot, or a deck that bounces mid-span will stall training no matter how good your treats are, because the dog is being rational. If progress stops, audit the equipment before the dog; the specs that make a ramp trainable in the first place are covered in our guide to choosing a dog ramp.
Special Cases: Seniors, Nervous Dogs, and the One Bad Slip
Three situations deserve adjustments to the standard plan.
- Senior and stiff dogs need shorter sessions, lower increments, and extra attention to the descent. If your older dog seems sore, tires fast, or has recently stopped jumping on its own, have your veterinarian take a look before and during ramp training; the ramp is an aid, and the rest of the aging-dog setup is covered in senior dog mobility at home.
- Nervous dogs do best when the ramp stages are folded into play and mealtimes: feed dinner on the flat ramp for a few days, scatter treats across it casually, and keep your own energy boring. Confidence transfers from the room to the ramp, not the other way around.
- The dog that slipped once is the hardest case, because one skid can undo weeks. Go back to the flat stage completely, fix whatever slid (base, surface, or tailgate lip), and rebuild with more repetitions at each height than the first time. Patience here is not optional; a second scare can make the avoidance permanent.
Training at the Car
The vehicle deserves its own paragraph because it stacks difficulties: the height is the tallest your dog will face, the ramp is deployed on variable ground, and trips often start with excitement or end with tiredness. Do the first car sessions with no journey attached, in the driveway, engine off, so the ramp is not tangled up with the emotions of leaving or arriving. Seat the top lip firmly, push-test the ramp sideways before every single climb, and guide from the side with a hand near the collar rather than pulling from the front.
Keep guiding descents at the car long after the climbing is fluent, since dogs love to leap the last two feet out of a trunk. If your vehicle is unusually tall or your dog unusually heavy, equipment choice does more than training; the long-and-gentle options are compared in dog ramp for car.
Common Mistakes That Create Ramp Refusal
- Starting at the tailgate. First contact at full height and full novelty is the classic error. The driveway debut comes after the living-room graduation.
- Forcing or lifting the dog onto the slope. A dog placed on a scary surface learns the surface is scary and the hands are too. Everything is lured, nothing is imposed.
- Sessions that run long. Five good crossings beat twenty grudging ones. Stop while your dog still wants more.
- Skipping the descent work. Most plans train uphill and hope. Downhill is the direction that needs the reps.
- Tolerating equipment problems. A shifting base or slick deck quietly punishes every crossing. Fix the hardware the moment you see a scramble.
- Punishing refusal. Balking is information about slope, footing, or fear. Answer it with an easier step, never with a correction.
Ready to Put It to Work?
If you are training ahead of a purchase rather than after one, it is worth matching the tool to the dog before you start: the full slope-and-grip logic lives in our dog ramp guide, and if you are not yet certain a ramp beats steps for your particular dog, the head-to-head in dog stairs or ramp settles that first. The same luring sequence, minus the incline stages, also works for pet stairs, so nothing you teach here is wasted if you end up with both.
Frequently Asked Questions
How long does it take to train a dog to use a ramp? Typically between a few days and two weeks of short daily sessions. Confident, food-motivated dogs can finish faster; cautious dogs and dogs with a prior slip need the slow version of the plan.
Why does my dog refuse the ramp? Almost always one of three things: the slope is too steep, the footing slips or bounces, or the dog was rushed past its comfort point. Fix the equipment issue if there is one, then restart at the flat stage.
Can old dogs still learn to use a ramp? Yes, and they are the dogs that benefit most. Use lower increments and shorter sessions, and involve your veterinarian if your senior seems sore or the reluctance to climb appeared suddenly.
Should I use treats every time forever? No; treats carry the learning phase, then real life takes over. Once the ramp is the established route to the bed or the car, the destination itself becomes the reward, with an occasional treat to keep the habit warm.
My dog walks up the ramp but jumps off the bed anyway. What now? Train the descent as its own exercise: block the favorite launch spot for a while, lure slow walks down with a treat held low, and reward at the bottom. Downhill is the harder direction and simply needs more repetitions.
Does this method work for dog stairs too? Yes. Skip the incline-raising stages and use the same reward-every-step approach on the bottom step first, then the full flight, both directions.
The Bottom Line
Ramp training is a short ladder: flat and rewarded, slightly raised, gradually steeper, then the real location, with the descent practiced as deliberately as the climb. Most dogs finish inside two weeks, and nearly every failure traces to rushing, forcing, or equipment that slips. Keep sessions short, let the dog set the pace, and the ramp becomes the route your dog chooses on its own.